How to move Hyper-V Virtual Machine in Windows
This article will take you through the steps by step process of Moving a Hyper -V Virtual Machine in Windows from one location to another. If you want to learn the process of How to move Hyper -V Virtual Machine in Windows, make sure to read this blog.
What is Hyper-V
Is Microsoft Virtualization software that allows users to run multiple operating systems on their host computer? learn more on Hyper-V system requirements.
Move Hyper-V Virtual Machine in Windows 10
1. Click on This PC icon on the Desktop to launch the Window, you find two Hard Disk that is Drive C: and Drive D: (when you look you see a red indication on Drive C: this means the hard drive is getting to finish and Drives D: have more space.)

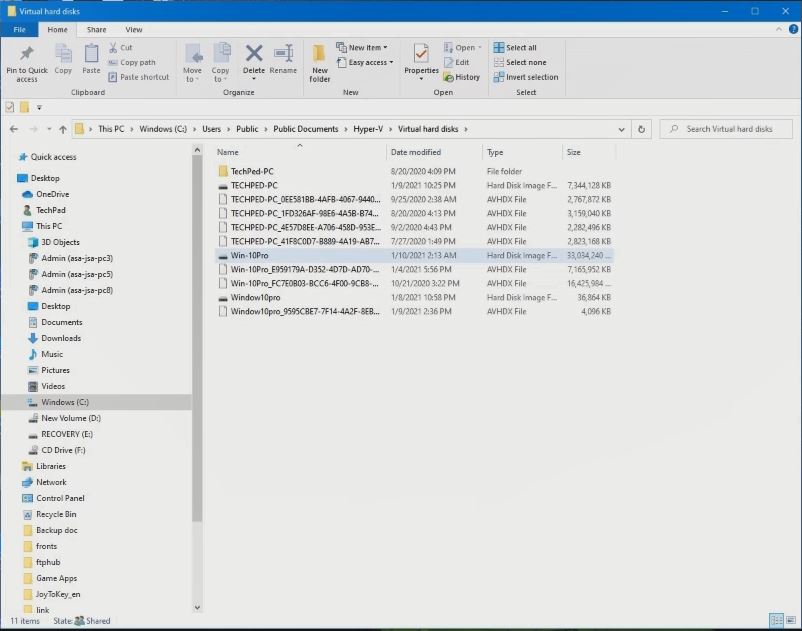
2. So to release space from “Drive C:”, Go to “users” then you click on “public folder” and then click on it, here you’ll find Hyper-V virtual hard disk.

3. In the root Click on the “Hyper-V” to open the “Virtual Hard disks” folder.

4. Right-Click on Selected Virtual Drive you want to move, create a destination folder and copy the Drive into the folder.

Watch The Video
Again, You can How to Mount USB Flash Drive to Hyper V Virtual Machine and attempting to solve pop up Error in Hyper-V when starting up the Virtual PC.
Conclution
Now, you must have an idea of How to move the Hyper-V Virtual Machine in Windows. Ask your questions in the comments below. Try to follow us on Facebook, Instagram , and Twitter. Also if the post has helped you Kindly subscribe to our YouTube channel to continue learning.
More Video

